
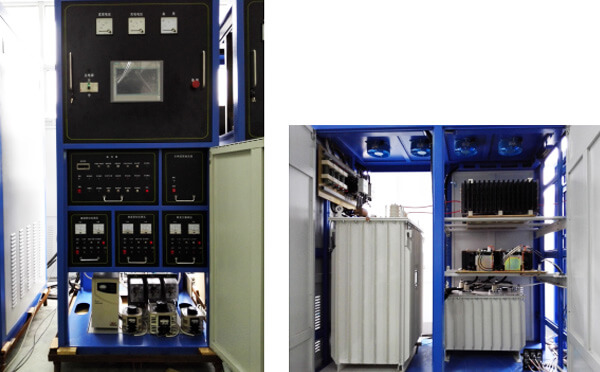
High voltage pulse modulator for klystron
The modulator includes a control cabinet, a charging cabinet, an artificial line cabinet and a pulse transformer.The control cabinet includes klystron filament power supply, thyratron filament power supply, thyratron hydrogen power supply, trigger unit, thyratron trigger and control system.The charging cabinet includes rectifier transformer, charging transformer and so on. The PFN cabinet includes the thyratron, the PFN and so on.
1.1 Please confirm the following items before you start the machine.
a)Whether the three-phase distribution cable is connected correctly;
b)Whether the high voltage cable is connected correctly or not.
c)Whether the system ground wire is connected correctly and firmly;
d)The water supply is normal in order to prevent leakage.
e)Whether the connecting cable between the cabinet is connected correctly and firmly;
1.2 Low voltage start
After three phase distribution power supply, the emergency stop switch is switched on, the circuit breaker is turned on, and the modulator system is powered up.After pressing the "start" switch of the touch screen interface, the thyristor filament power supply, the thyristor filament power supply, the klystron filament power supply begin to output and slowly rise to the set value.At the same time, the “start timer” is displayed on the touch screen, and the start time can be set by the user.The system gives a signal after the value of the filament current to the set value, and then "the filament preparation timer" starts, "the value of the filament preparation timer" can be set by the user.After the completion of the filament preparation, the "start timer" and "the filament preparation timer" disappear in the touch screen interface.
1.3 System ready
If the modulator system does not have any fault after the filament is preheated, press the “reset” button, the modulator is ready, and the "high voltage allowed" state is displayed on the screen.
1.4 Increase or reduce high voltage
Under the system ready condition, press the "start high voltage" button, ring the bell first, then connect the high voltage contactor, and light the alarm light.After 1 minutes, the full voltage contactor is absorbed.
Press the "increase the high voltage" button to output high voltage and gradually increase the high voltage value (the step of increasing the voltage can be set at the touch screen interface).After the high voltage rises to the set value, the "full voltage" lamp in the trigger unit is lit.
Press the "reduce the high pressure" button and the high voltage gradually decreases until the “zero position” lamp in the trigger unit is lit.
1.5 Disconnect high voltage
Before disconnecting the high voltage, the high voltage is first reduced to zero.
Press the "disconnect high voltage" button to disconnect the high voltage contactor and stop the high voltage output.


